It’s important to know what you’re working with before you begin creating, so open Vectr up and let’s get started!
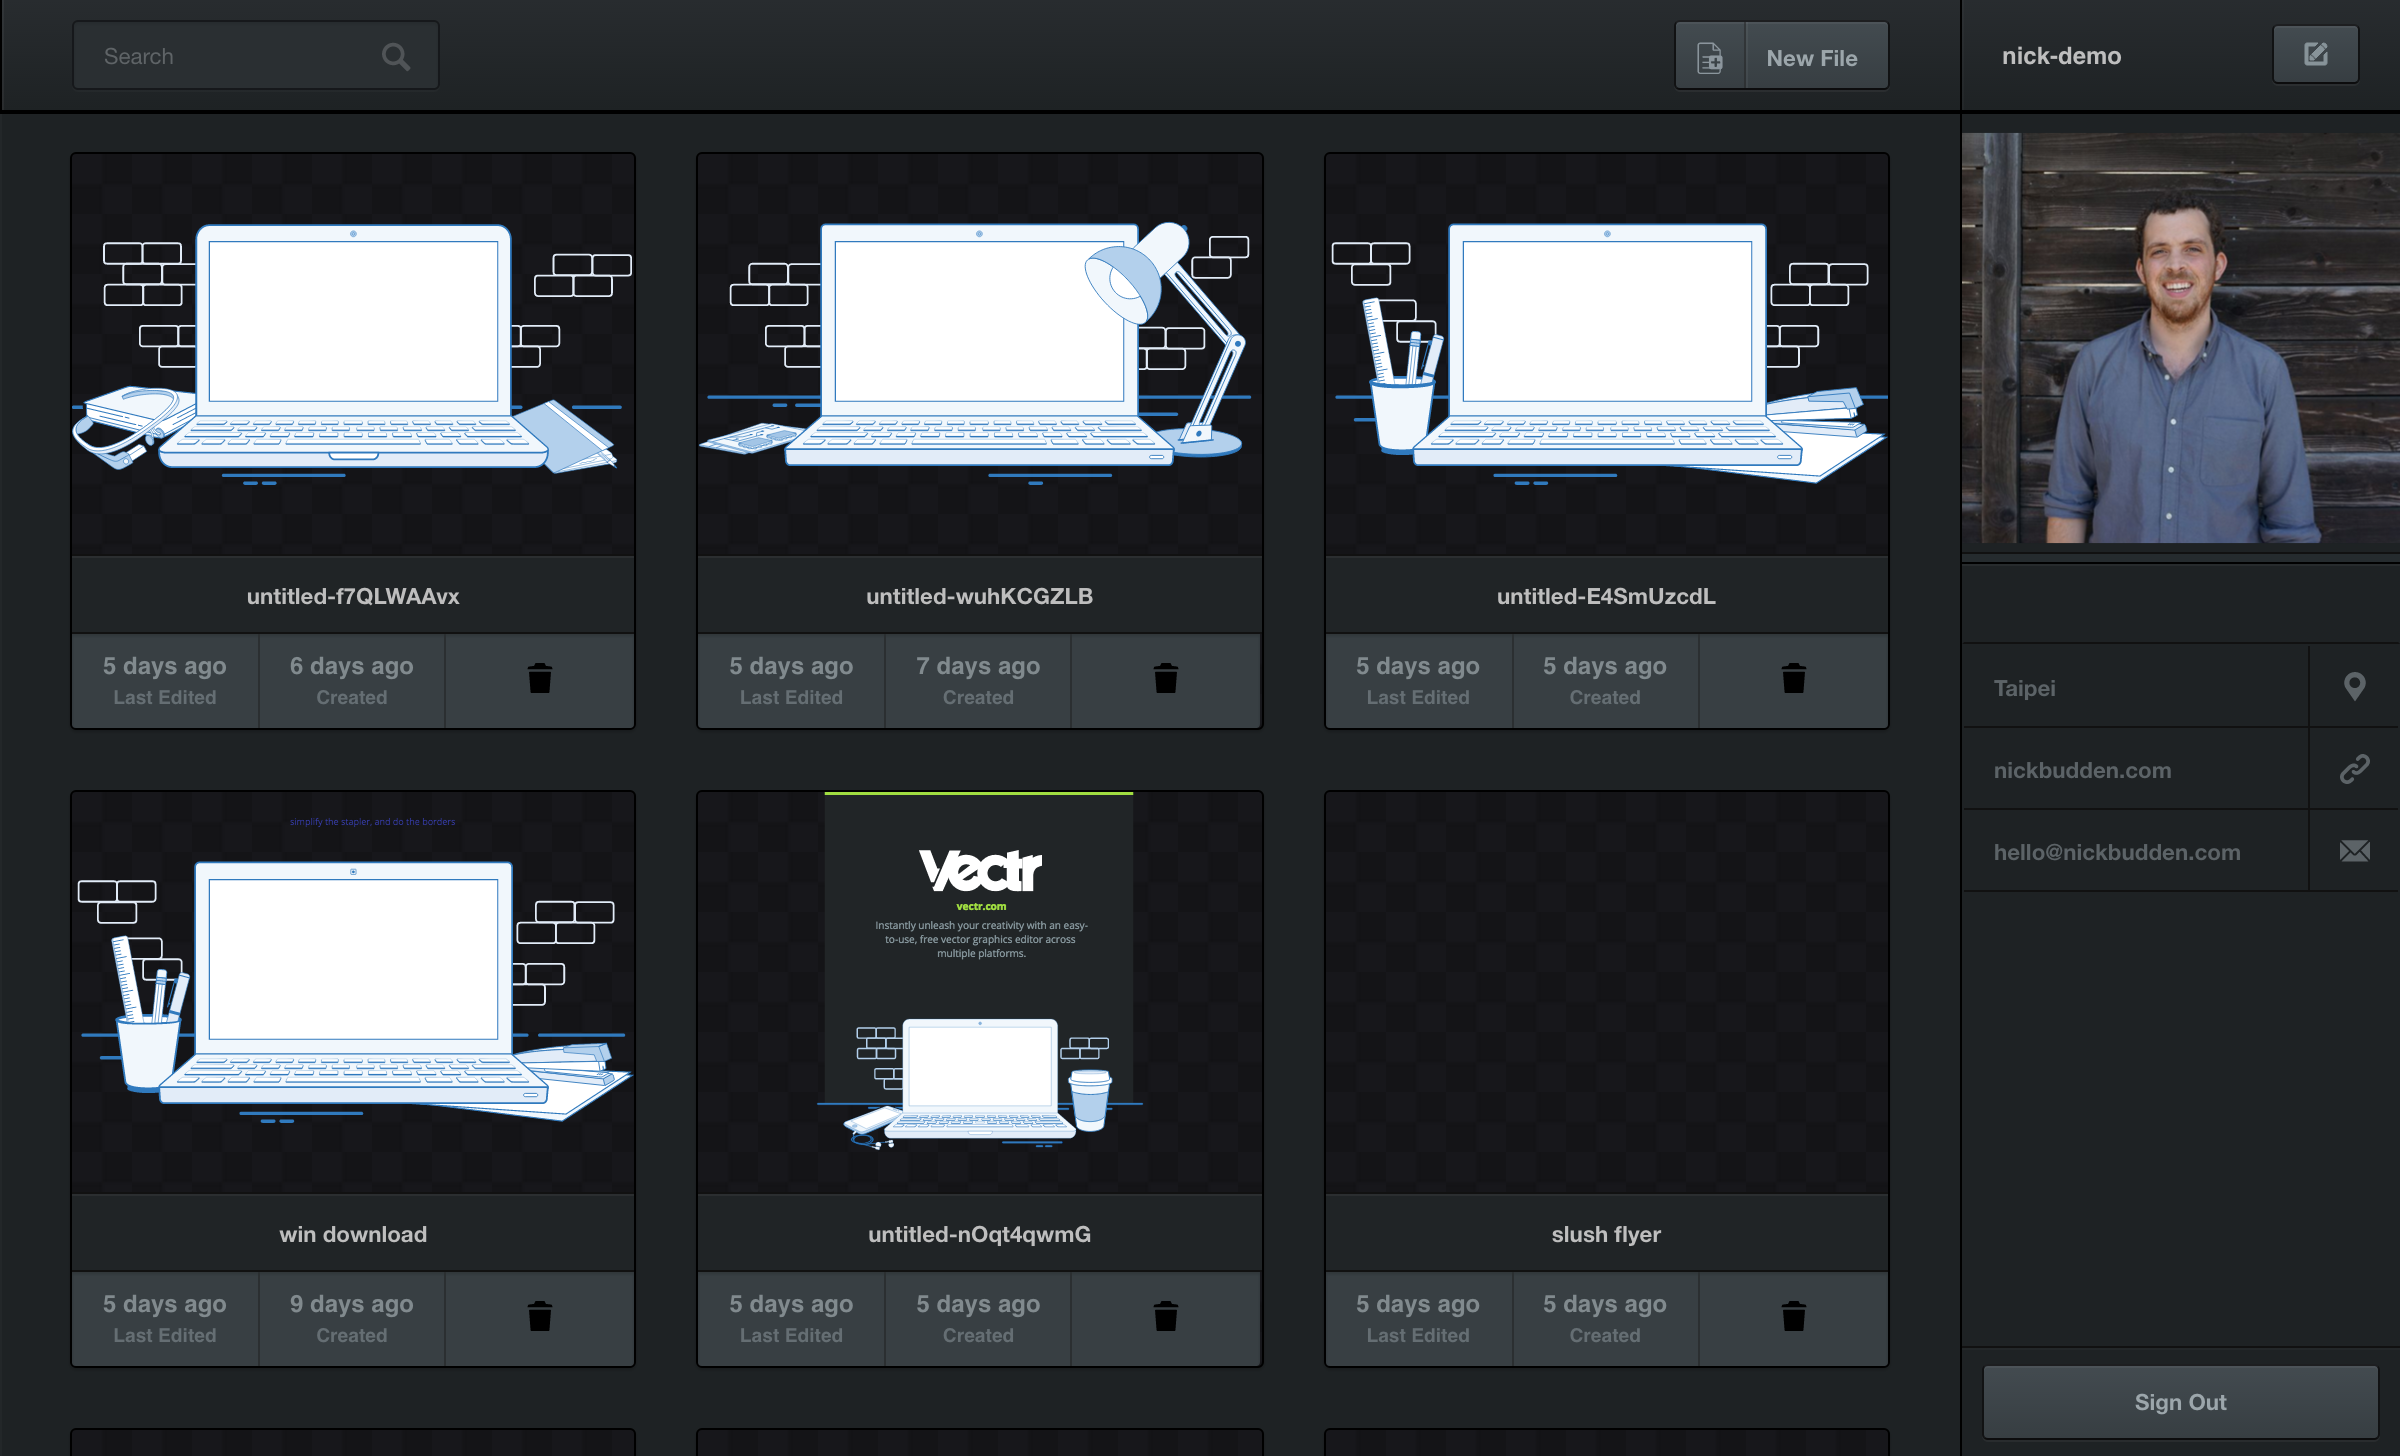
Once you sign in, you’ll be welcomed by the Vectr dashboard, which is split into three sections. These sections are described below.
Right Sidebar
The sidebar on the right shows your profile avatar and information, which can be edited by clicking the edit icon on the top-right corner next to your username. You can edit your avatar, write your bio, add basic information, choose a different language setting, or change your password. Don’t forget to hit the save button when you finish editing!
Your Files
The middle of the dashboard contains previews of all your Vectr files, arranged by most recently edited. You’ll be able to rename each file by clicking on its filename.
The bottom of each file shows when it was last edited, as well as when it was created. If you’re not feeling your design and want to delete your file, click the recycle bin icon and it will be moved to the trash.
Menu Bar
The menu bar contains the search bar on the top-left corner and the New File button on the top-right corner.
You won’t want to stop creating once you get started with Vectr, which means you’ll end up with a ton of files to sift through. But don’t worry, you won’t lose any of them! Just enter the filename of the creation you’re looking for in the search bar, and the creation box you wanted will appear.
Create a new file by selecting the New File icon. This will automatically take you into the Vectr workspace. Prepare to be amazed!zed!
