How to Create Collages

What do you like more than capturing life’s most precious moments? Combining those moments into collages to share with friends and family. We get it.
In this tutorial we’ll show you how to create your very own collage in 5 easy steps. With Vectr, you get to customize every single aspect of your collage from the shape of your collage to the size of your photos without any hassle.
We’ll show you how to create an easy collage first. But if you like to keep things as simple as possible, stick around until the end because we have 7 templates for you to choose from.

- Change page setting. Select the Pages tab in the Editor and you’ll see the page setting section on the bottom. Let’s change the page size to 600px by 600px (the perfect size for Instagram images).

Set background color. First, make sure the Snap tool
 is enabled in the upper-left of the Editor. Then select the rectangle tool
  . Click and drag the rectangle from the top-left corner to the bottom-right corner of the page.
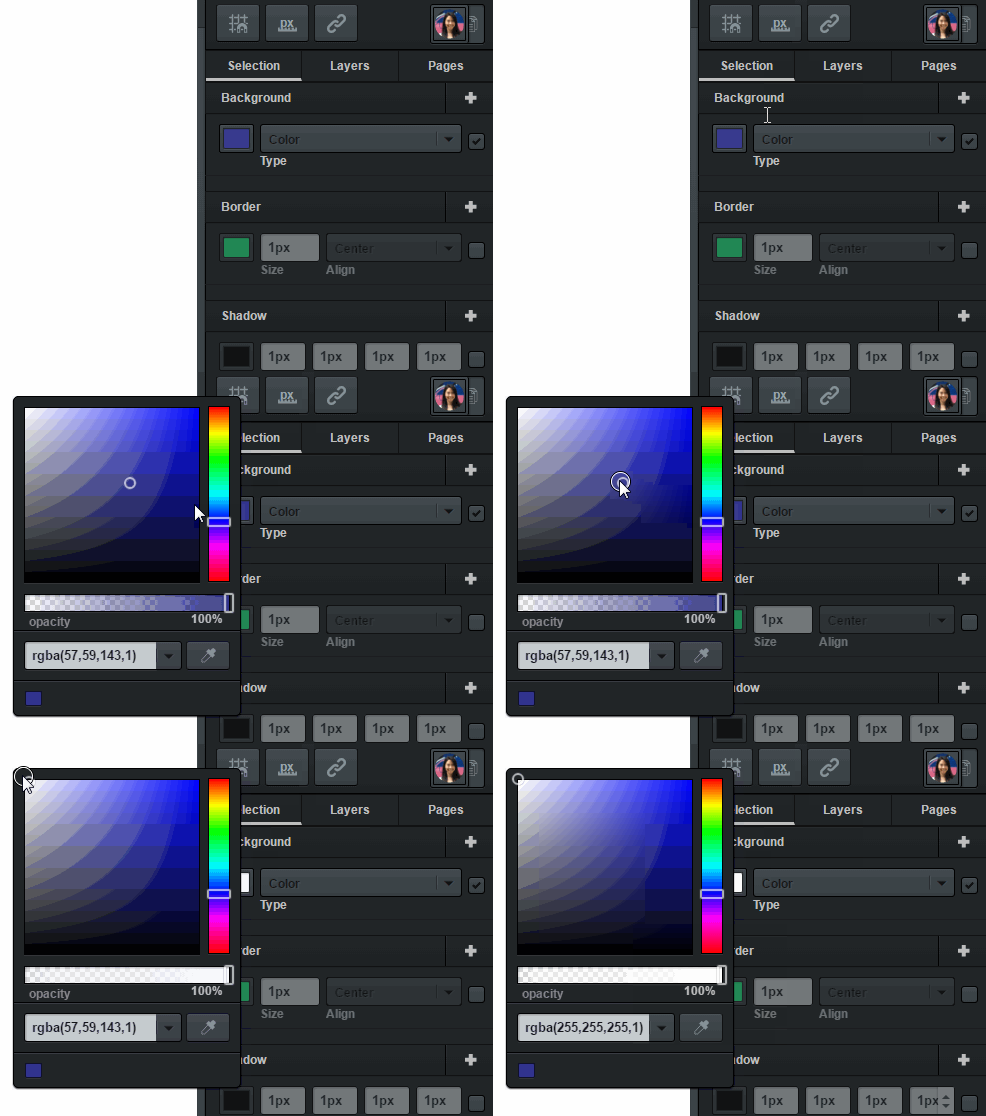
 Next, in the spirit of simplicity, choose a white background color under the background filter in the Selection tab.
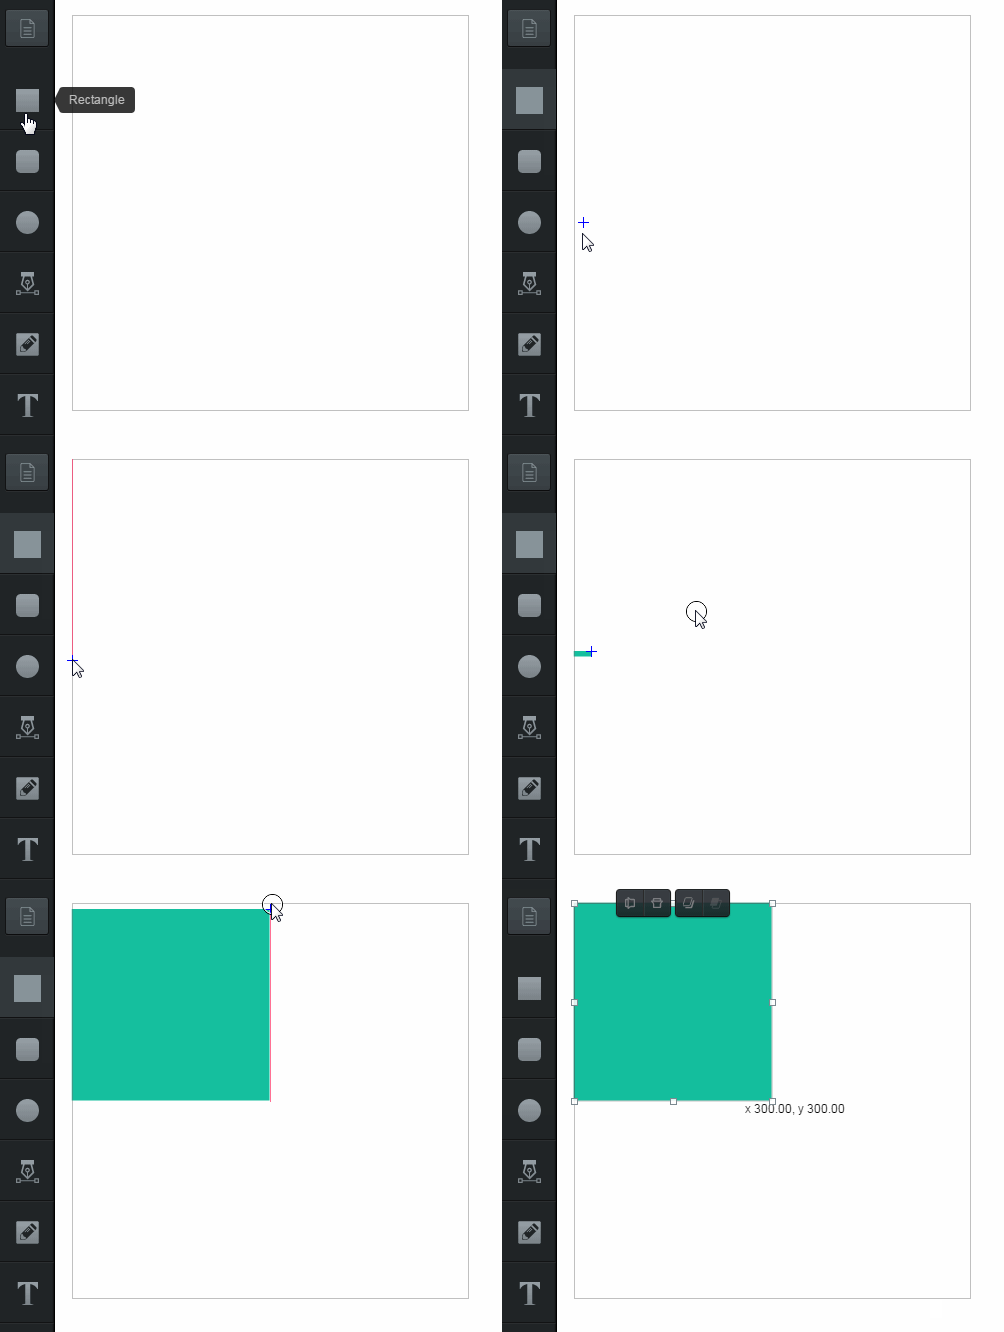
Create collage template. For a collage with four photos, create four squares within the page. The Snap tool allows red guidelines to show up when you’re creating elements in the board. Long red lines indicate that the element is in the middle of the board. To create the first square, select the rectangle tool.
Hover your mouse over the middle-left of the board until a long red horizontal line appear. Click and drag the rectangle to the top-middle of the board until another long red vertical line appears.
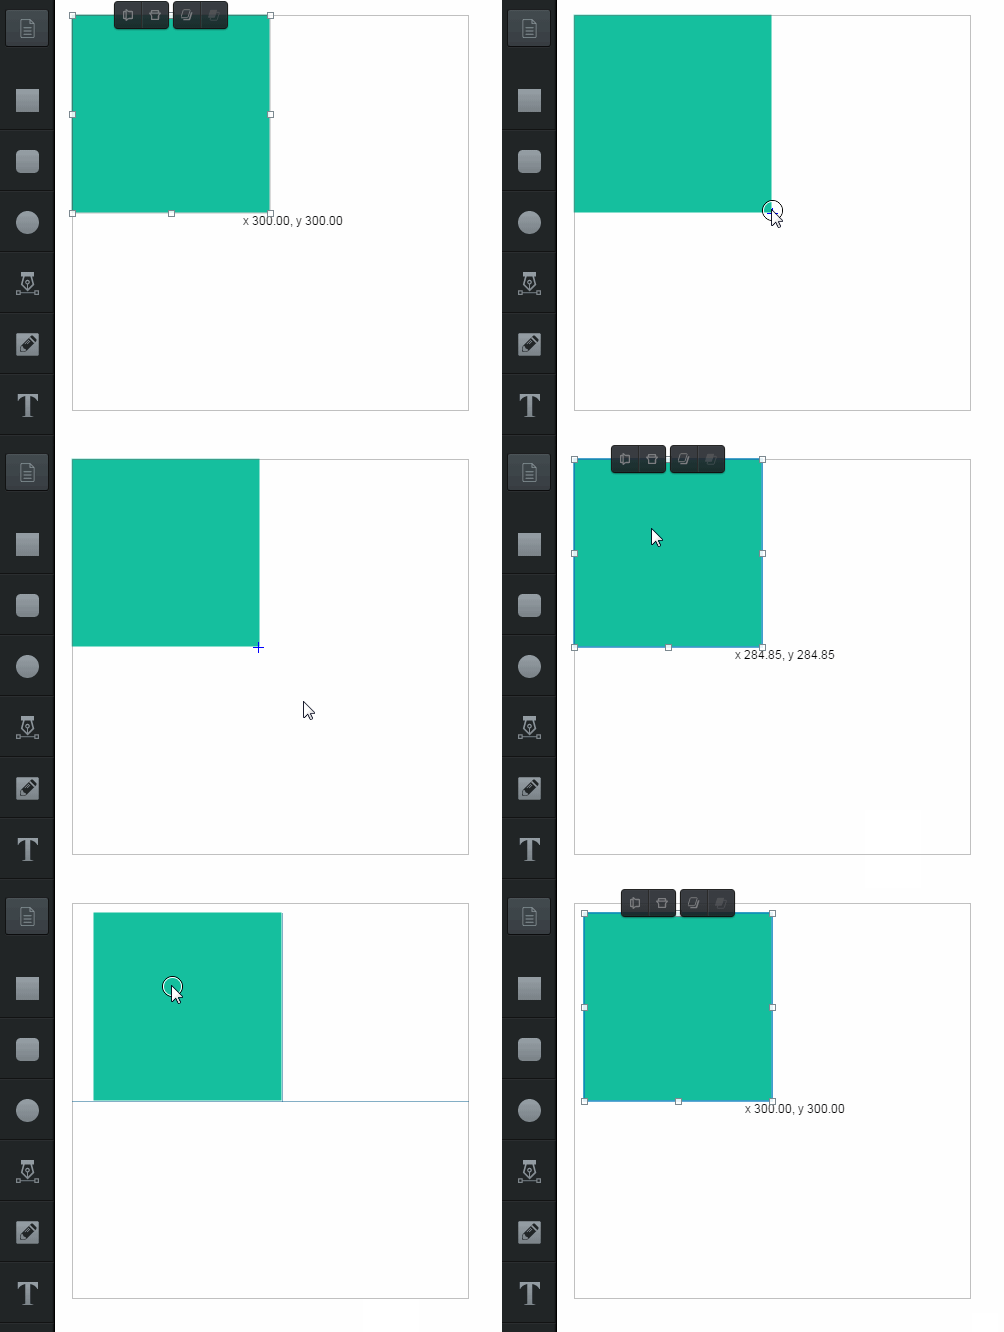
 Then adjust the rectangle size according to your preferences (remember, holding Shift while adjusting the size keeps the elements proportions).
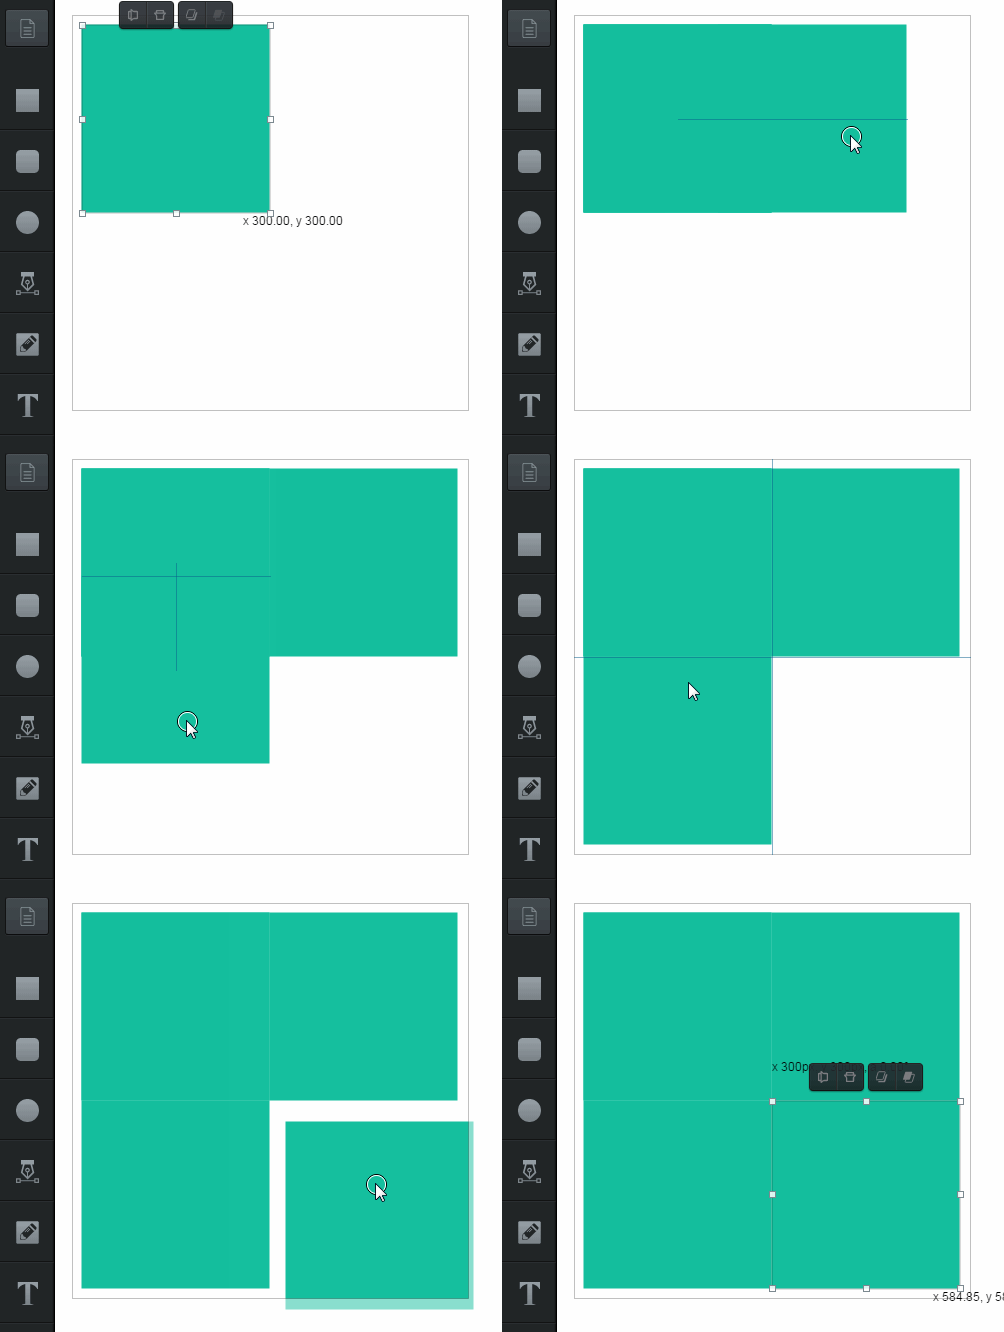
 Copy and paste the first square three more times. Then drag the copied squared into their corresponding places.
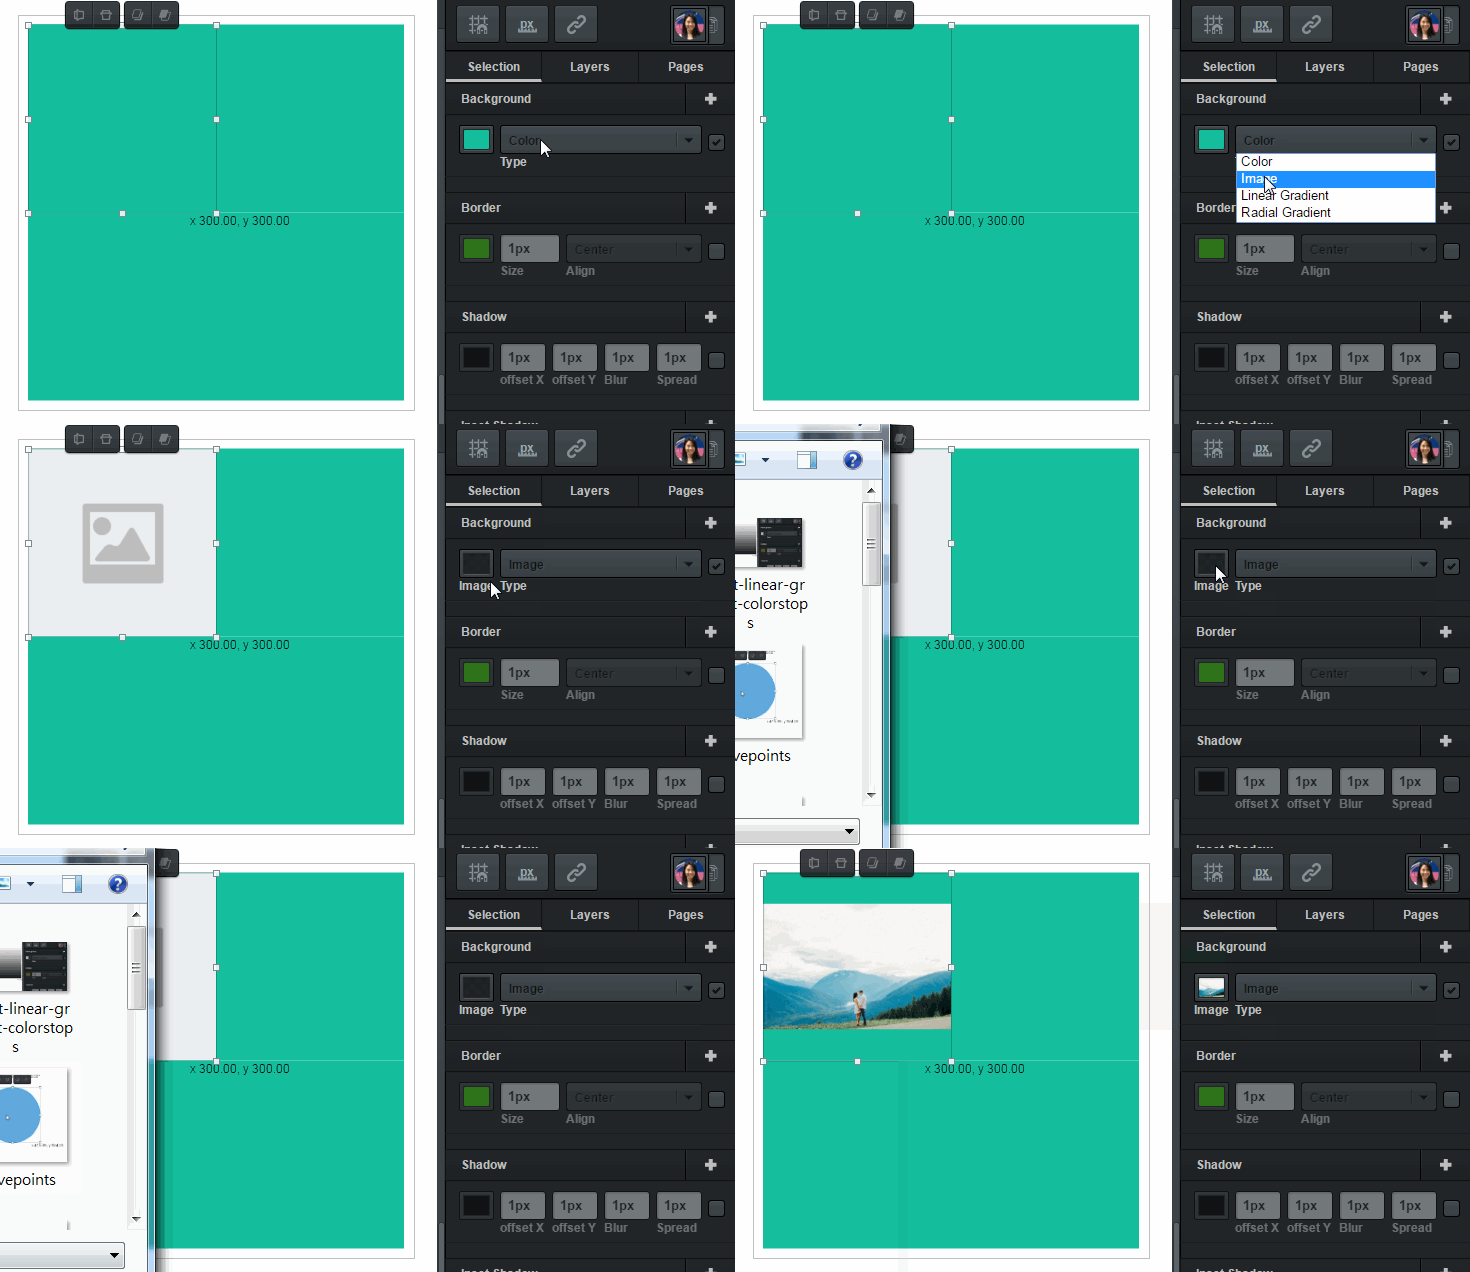
Insert photos. Select a square. In the Selection tab, choose the image background filter in the drop-down menu. Click on the small image preview box. Then choose the image file you want to open.
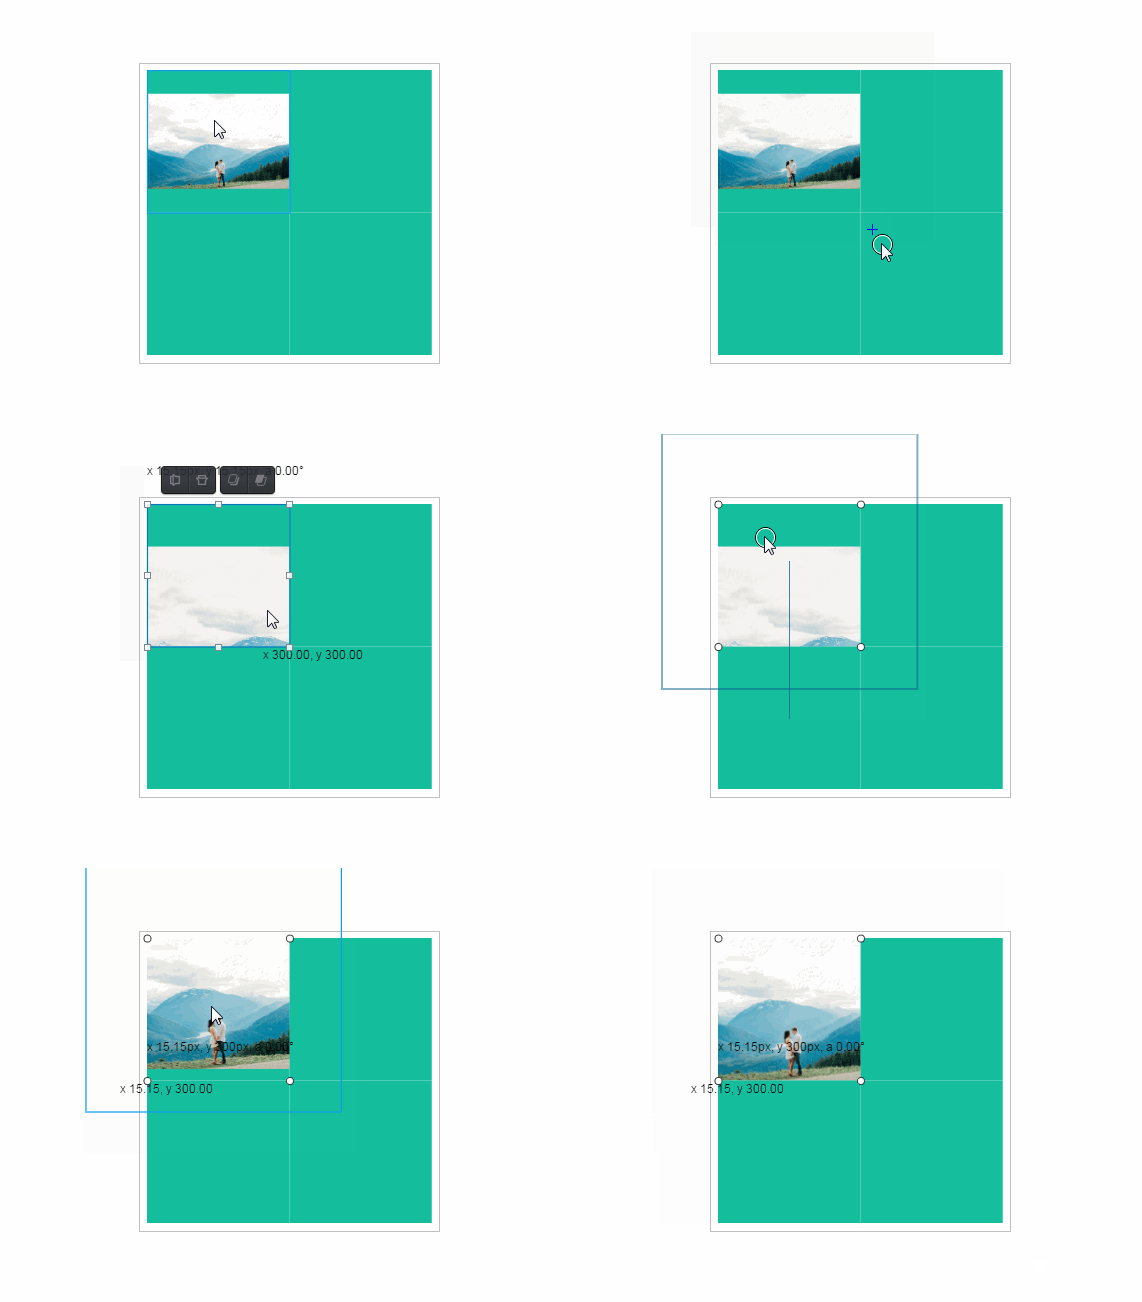
 Once the image is inside the square, you can adjust its size by double clicking the square until a blue box appears. Click once more until a brown box appears. The brown box allows you to adjust the size of the image. The blue box allows you to change the placement of the image within the square.
 Repeat this process for the remaining squares.
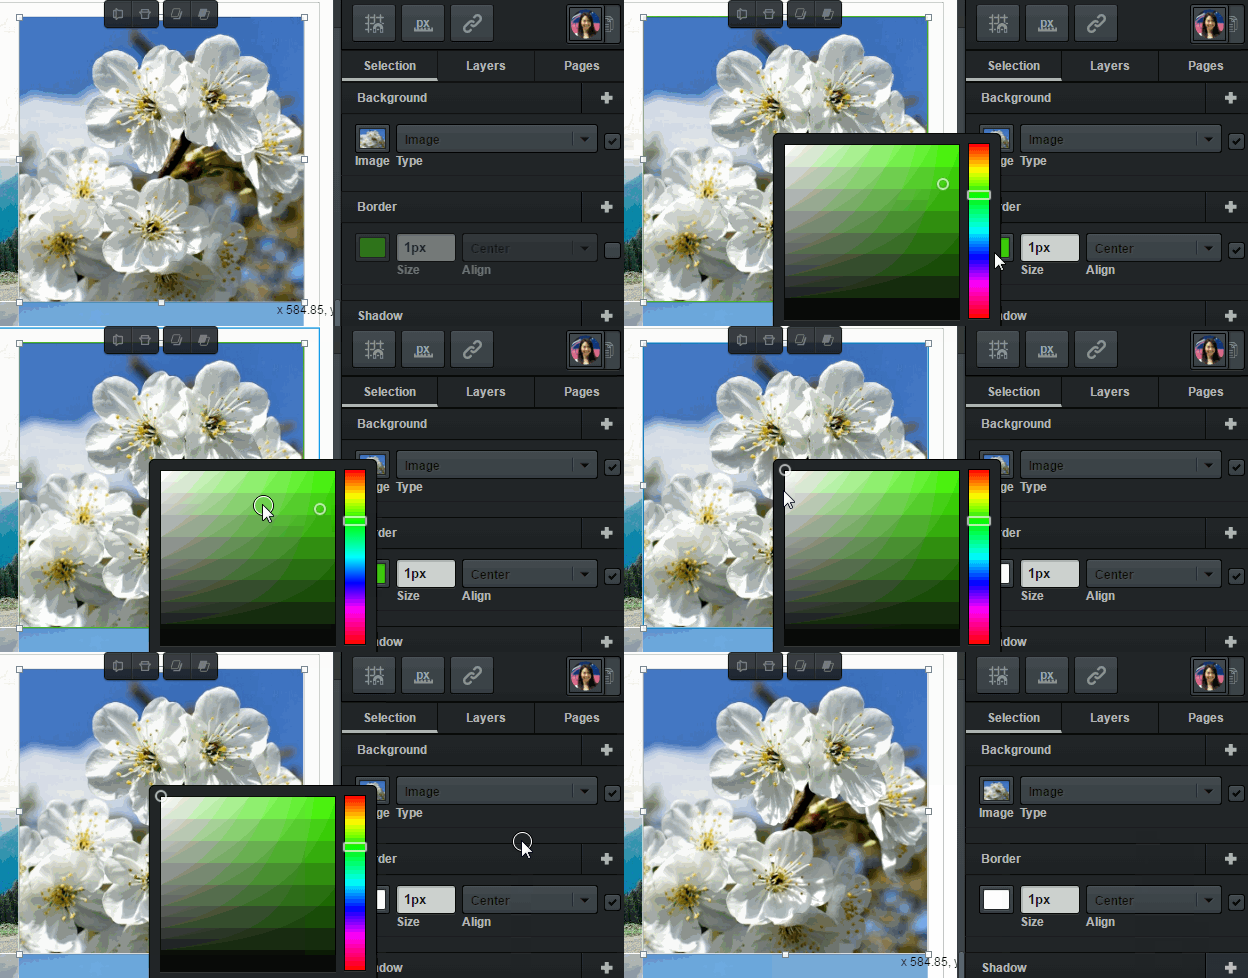
Add borders to images One last step! Your collage is almost there! Now all that’s left is adding a white border to your images. To add a border, select your image. In the border filter section, click the color preview box on the left. Set the border color to white with a size of 1px. Add borders to the rest of the images.
Share collage with friends. Hooray! You did it! You’ve finished your collage! Post your awesome collage loudly and proudly on social media using #madewithvectr. Don’t be shy!

The types and shapes of collages you can create with Vectr are limitless. This tutorial just showed the most basic kind. Here’s another example of something you can make:
As promised, here are 7 templates you can copy and paste onto your own files to do as you wish with.
Can’t wait to see what collages you’ll create! Have fun! 

